Summer 2014 – Gearing up for the new school year

Our blog has been quiet for a while, but don’t worry, fall semester has started, so we’re back to show you some of what CommAg has been up to this summer and what our plans are for the next couple of semesters.

IMG_3366

Filling up the beds with fresh soil

IMG_3251

Maggie and Alex assembling our new bench

A few dedicated members and a very committed advisor have been working hard all summer to beautify and update our Washington Square Village garden. The wood of a lot of our beds had completely rotted through, the soil we had was so nutrient-depleted after many years of use that it hardly grew anything (even weeds!), and the space in general needed a lot of loving. Alex, Christina, Maggie, Morgan and Nick began meeting weekly to update the garden in May. We requested some new beds and fresh soil, built some new beds and lined them, redid our compost area in the back, added a bench and planted tons of flowers and veggies.

IMG_3479

Cherry tomatoes and basil, with sunflower sprouting in the back

IMG_3425

Some of our new beds with happy sproutlings

IMG_3484

Spinach and beans

IMG_3372

A midsummer lettuce harvest

The garden is already blooming with big tomatoes plants, zinnias about open and bean stalks climbing up their trellises. We can’t wait to spend a lot of time in the garden with you all this fall semester and to continue working on the garden. We’re even hoping to use some of the produce to make delicious snacks for our meetings and use the garden to learn about agriculture in the city. We’ll be sending out meeting information over our OrgSync list (join here), on Twitter and on Facebook. We hope you’ll join us this semester!

Leave a comment

Filed under Uncategorized

Be a Part of the Brand New NYU Farm – Volunteer 10am – 7:30, Thurs. to Sun. — Houston and Wooster

Hi Everyone!

After long delay the NYU Urban Farm Lab is about to be established at an accelerated pace. Over the next four days — Thurs. May 30th to Sun. June 2nd — we are going to transform the patch of ground at Silver Towers from bare dirt into neatly laid out garden beds, mulched paths, and hopefully even start planting.  In order for this to happen, your help is urgently needed for several intensive work days.

On the first day we will be marking out and shaping the beds.  On the second and third days we will be further digging the beds and spreading mulch on the paths. On the fourth day these activities will continue and it is hoped that we might also be planting.

This is also the time for people who want to be involved in a committed and responsible way to become familiar with the garden and to talk about planning.  In Food Studies Professor Matthew Hoffman’s absence, some people will have to be responsible for planting and transplanting and for watering whatever gets planted.  On Saturday he will lead an introductory workshop on garden planning so that those who want to take responsibility for it can know how to organize planting in time and space.

If you are willing to volunteer, be it for an hour, a day, or several days, please follow this link to the official volunteer page and sign up for one or more time slots between 10am and 7:30.  The NYU Farm is located on the north side of Houston Street in front of the Silver Towers building on the corner with Wooster, here.  Make sure to dress appropriately for work: trousers in which you don’t mind kneeling in the dirt, sturdy shoes, gloves if you don’t want to dirty and roughen your hands, and generally clothing that you don’t mind getting dirty and abrading.  If you happen to have a garden fork or spade (the digging kind) bring it along.  On Friday-Sunday a pointed shovel will also come in handy.

We won’t be able to get this done without a lot of help, so if you are at all able to volunteer, please do.  This will only happen once — be a part of history!  We will have a lot of fun and you will have ample opportunity to learn one of the most fundamental skills of biointensive gardening: how to prepare garden beds.  Join us!

Thanks for you help!

The Farm Crew

Leave a comment

Filed under Uncategorized

Food News

Hello blogging world! I know it’s been a while, but life has been a little crazy lately what with mass amounts of end of the year school work and the onset of warm weather, dragging me away from the computer any chance I get. It’s time for some more food news though, because as always there is plenty of interesting stuff going on! And hopefully after this, I’ll get back on the ball for the next few weeks until the end of the semester.


1. Cheesy Bread Bowl Pizzas? 

First I want to showcase this crazy new pizza Dominos is doing. Cheesy bread bowl crust?! And what about the fact that this article also discusses a Pizza Hut specialty only available in the Middle East that has a crust made of mini cheeseburgers? I like to consider myself a healthy and mindful eater, but I would petition to bring that to America. 

Image


This all seems like (delicious) fun and games, but as I was perusing the web I also found this article about the lack of progress chain restaurants have made in improving their children’s’ meals. There is an especially interesting debate that could be had here concerning how much choice should be left to the consumer. To an extent, maybe Applebee’s is right to defend themselves, since they offer both healthy and unhealthy children’s’ meal options. But in reality, what kid picks the steamed broccoli? With the New York soda ban in the news lately this is an especially relevant time to be thinking about the level of responsibility people should be entrusted with concerning their food choices. 


2. A “Freegan” Restaurant

This article may not provide the perfect Applebee’s alternative, but it does showcase one cool way to eat out. Tufts student, Maximus Thaler, is planning to open a café supplied by products he has accumulated through dumpster diving. This article raises some interesting questions surrounding the feasibility of a “freegan” restaurant. Since it is a grey area of legality, he will have to run it out of his apartment. Could there ever be a real, larger-scale “freegan”restaurant? Another important point made was that they can’t plan the menu in advance. What a unique factor for a restaurant to have to work with! To me, this seemed like it could be a good thing, taking us away from a mindset of being able to eat what we want when we want. 


3. Are Nutrients Really All We Need?

Here’s a short, but somewhat mind-boggling article for you. An Atlanta based software engineer is currently living off a liquid diet that he believes contains all the nutrients you need to survive. And he even looks pretty healthy in the picture, surprisingly enough. This was reminiscent of a really great book I’ve been reading (and that you should read), Michael Pollan’s, In Defense of Food. In this book, Pollan discusses the issues around reducing foods to just their nutrients and the ways that this actually affects our health in a negative way in the long run. Taking the nutrient out of the context of food is a harmful phenomenon that has gotten quite popular during America’s nutrition phase. And most importantly, it takes all the joy and pleasure out of eating!

Image


4. Vermont Is Awesome

Here’s one last thing because, well it’s just awesome. In this article  a Vermont farmer is building a sailboat in order to transport his produce to New York City. Enough said. Vermont is awesome. Here’s a link to the project as well (The Vermont Sail Freight Project).

Image

Leave a comment

Filed under Uncategorized

GETTIN’ CHEESY

(Yeah, that title is super cheesy. It was on purpose and also not because I am cheesy and I like it)

Happy post- daylight savings day and almost springtime time. Last Thursday we spent our meeting chatting and turning simple ingredients like flour and salt and water and milk into delicious food that is usually really expensive in the grocery store. Here are some pictures of us doing that and the recipes we followed!

Recipes:

Mozzarella
~~~~~~~
1 1/2 tsp citric acid

1 1/4 cups cool water (filtered or boiled)

1 gallon whole milk (not ultra-pasturized)

1/3 teaspoon liquid rennet

4 tablespoons kosher salt
~~~~~~~~

  1. Ice a large, heavy pot. Combine the citric acid with one cup of the water in a 2-cup liquid measuring cup. Add the milk to the pot. Slowly pour the citric acid mixture into the milk, gently stirring with a slotted spoon for 15 seconds. Set the pot over medium heat, attach a cheese or candy thermometer to the pot, and heat the milk to 90F, stirring every 2 to 3 minutes. This will take about 10 minutes, and the milk with start to curdle. Remove the pot from heat.
  2. Combine the rennet with the remaining 1/4 cup water in the liquid measure. Pour the rennet mixture into the milk, and gently stir with a scooping motion for 30 seconds. Cover the pot and let sit for 5 minutes. The curds will solidify into on mass that looks like tofu or custard. Press your finger about 1/2 inch into the curd. If it comes out mostly clean, the curd is ready to cut. Otherwise, check again in two minutes.
  3. With the curd still in the pot, cut it into 2-inch cubes: place a long knife 2 inches from the left side of the pot and draw it through the curd toward you in a straight line, taking care to cut to the bottom of the curd. Continue with parallel lines to the first in 2-inch increments. Turn the pot 90 degrees, and repeat so you have a grid. Then, make 2-inch diagonal cuts at 45 degree angle to the side of the pot. Repeat from the other side. Cubes of curd will float in the whey.
  4. Return the pot to medium heat and stir the curds very gently with a slotted spoon as you heat the whey to 110F. Remove from heat. Set a metal colander over the mixing bowl and use the spon to gently transfer only the curds into the colander. Set the curds aside.
  5. Return the pot with whey to medium high heat. Add the salt and heat the whey until it reaches 170F, about 10 minutes. If there is any whey in the mixing bowl, add it to the pot. Reduce the heat to medium to keep the whey between 165F and 180F for the next step.
  6. Transfer half the curds to a medium mixing bowl and set them aside. Submerge the colander with the remaining curds into the hot whey until they get glossy, about 1 minute. Put on heatproof rubber gloves o pick up the curds and firmly squeeze them into a ball over the pot. The ball will release more whey as you squeeze. Put the ball back into the hot whey for 1 minute, then stretch between your hands, folding it back on itself. Put the cheese into the whey again and repeat the process up to three times, until the cheese is soft and glossy and holds together as you stretch it up to 12 inches. The surface of the cheese should be smooth. When you have reached this consistency, you can eat the mozzarella warm, dividing it into little balls if you’d like. Repeat the heating and stretching process with the second  half of the curd.
  7. If you would like to store the cheese, put the balls in a bowl, cover with cool water, and let sit for 5 minutes. Then add ice cubes and keep the mozzarella there for 30 minutes. Remove the cheese from the water and transfer into a covered container.

Wheat Crackers

Makes 50 to 60 crackers

~~~~~~~~~~

1 cup all purpose flour plus additional flour for the counter

1 cup spelt or whole wheat flour

1/2 tsp baking powder

1/3 cup whole, uncooked millet

1/3 cup ground flax seeds

1/2 tsp kosher salt, plus more for sprinkling

Optional: 5 medium garlic cloves, minced, and 1 tbs minced fresh rosemary

1/2 cup plus two tablespoons olive oil

Freshly ground pepper
~~~~~~~~

  1. Preheat oven to 350F. In a medium bowl, combine the two flours, baking powder, millet, flax, salt, and garlic and rosemary, if using. Add the olive oil and combine with a fork. Slowly add 1/2 cup water, mixing with your hands as you go. Continue to add more water (up to 1/4 additional water) to the dough until it holds together. Knead the dough with your hands in the bowl for 2 minutes until it is smooth and very workable.
  2. Turn out the dough onto a floured surface, press into a flat disc, and roll with a rolling pin until the dough is 1/8 to 1/4 inch thick. For square crackers, use a pizza wheel or sharp knife and cut the dough into 2-inch squares, For round crackers, use a 2-inch biscuit cutter. Any leftover dough can be rerolled for more crackers.
  3. With a spatula, transfer the cut dough to ungreased baking sheets and sprinkle each cracker with salt and pepper. Bake for 20 to 22 minutes, switching the position of the sheets and rotating them midway through, until the crackers are hard to the touch. Transfer to a wire rack.

Storage: covered container, 7 days

Freezer: freezer-safe container or bag, 3 months (recrisp in a 375F oven for 3 minutes)

Cheese Crackers (like Cheez-its)!

Makes 40 to 45 crackers
~~~~~~~~~~

3 tablespoons unsalted cold butter, cut into 1-inch cubes, plus additional for baking sheets

1 1/2 cups all purpose flour, plus additional for the counter

1 tsp dry mustard powder

1 tsp salt

1 1/2 cups grated cheddar cheese

2 tsp distilled white vinegar

1 ice cube
~~~~~~~~~~

  1. Combine the butter, flour, dry mustard, and salt in the bowl of a stand mixer. Mix on low speed with the paddle attachment until the mixture is crumbly and the butter starts to integrate into the mixture, about 30 seconds. Add the cheese and mix again on low speed for a few seconds.
  2. In a liquid measuring cup, combine 3/4 cup water, the vinegar, and the ice cube and let sit for a moment to get cold. Add 6 tablespoons of the vinegar mixture to the dough and mix on medium speed for 20 seconds. Continue to add liquid, 1 tablespoon at a time, until the dough clings in a ball to the beater. Then mix for an additional 30 seconds. Mound the dough into a ball, wrap it in waxed paper or plastic wrap, and refrigerate for at least 2 hours, and up to 3 days.
  3. Remove the dough from the fridge 15 minutes before you are ready to roll it out. Preheat the oven to 325F and grease two baking sheets. Turn out the dough onto a floured surface, press into a flat disc, and roll with a rolling pin until the dough is 1/8 to 1/4 inch thick. For square crackers, use a pizza wheel or sharp knife to cut the dough into 2 inch squares. For round crackers, use a 2-inch biscuit cutter. Any leftover dough can be rerolled for more crackers.
  4. With a spatula, transfer crackers to greased baking sheets, allowing 1 inch between crackers. Bake for 30 minutes, rotating trays halfway through baking, or until the crackers are lightly golden. Turn off the oven, but leave the trays in the oven as it cools for at least one hour.

Storage: Room temp, covered container; 5-7 days.

Freezer: freezer bag, 4 months (recrisp in a 375F oven for 3 minutes)

**All recipes are from Alana Chernila’s The Homemade Pantry**

Leave a comment

by | March 12, 2013 · 8:35 pm

Reflections on Valentine’s Day

At last week’s CommAg meeting, one of our members (who I happen to be madly in love with) talked about the importance of the word “community” in “Community Agriculture”.  The club revolves around agriculture and food, but it’s really about something much more: the comradery and love that blossom when our interests bring us together and propel our the development of our relationships. In honor of today, Valentine’s day, I made a list of things that are relevant to my conception of love, whether amongst a group, between two friends, or a boy and his boo.
– Listening to a great song and staring out the window of a subway as it goes over a bridge while thinking about someone cool.
– The first hug for a long time.
– Sharing an orange.
-Cooking together.
– Icebreakers with a group of great folks.
– Snowball fights.
– Good deeds, like giving up your seat on the subway or buying a sandwich for someone hungry without a home.
-Yesterday I saw a man drinking a King Cobra on the stoop around the corner of the Tisch building.  I greeted him and we shook hands and I told him that I love Cobra too.  It was really nice.
– Persevering through hardship. If you have only have one bowl and one spoon and a half cup of rice, sharing it with your best friend will make it great. Love is the best spice.
-Two people laughing together who don’t speak the same language.
A big part of love  is realizing that we all are, to some degree, the same.  We each have our own relation to the human condition, and when people find that their reference points to life are similar, they connect.  And that’s awesome.
Happy Valentine’s Day!

Leave a comment

Filed under Uncategorized

Food News

Hello fellow foodies, this week I have a couple of cool, food related articles for you, a feature I hope to be doing on a semi-regular basis. Food politics, environmental and agricultural issues, etc are really expansive, interesting fields right now, and it seems like every day there is more and more information put out there about various food issues. As someone who is really interested in these sorts of subjects, I do plenty of perusing various Internet sites and reading about such things while I am supposed to be doing homework. I consider it a somewhat better use of time, as it’s a way to educate myself on very prevalent, pressing issues, and maybe even become a better citizen of the world. So hey, take a break from homework or whatever obligations you have and take a minute to read and think critically about these articles.

1. The first thing I’ve got for you is a really fascinating debate that is going on involving problems of eating locally, vegetarians and veganism, and food disparity between countries. As food issues often do, this controversy revolves around a seemingly innocent and inconsequential food – quinoa.

First, check out the original article, a piece done about the price paid for quinoa in the countries that produce it.

Image

To follow up, here is a PETA fueled response that argues back that ultimately eating meat does more damage than vegan products such as quinoa do.

2. Next, here’s an issue that hits a little closer to home – the new soda ban happening right here in our own city. To be honest, I hadn’t given this much thought, seeing as I am not really a soda drinker. But, this article got me thinking about some of the broader effects that the ban might have.

What do you think is more important here? Do you think the ban will even do anything to help obesity in the first place, because that’s another vital question all in itself? When it comes down to it, if I thought the ban was going to be really effective, I would say health is more important, and that the businesses will have to adapt. However, how effective is a ban going to be if someone can still get a huge slurpee at 7/11? And I think it’s a fair point made at the end, that education, encouragement, and community programs are often more effective than forcing the public’s hand.

3. And for our last article, I’ve got a little bit of comic relief to distract you from these heavy, pressing issues. I recently stumbled across this while skimming the food section of the Huffington Post. It’s funny, disturbing, and genius all in one. What a world we live in…

Image

Leave a comment

Filed under Uncategorized

Root Vegetable Chips Recipe

Image

I’m not gonna lie, I did not expect these to turn out as well as they did.  The way the sugars in the root vegetables caramelize when you roast them is delicious.  They become entirely different tastes.  The harsh bitterness of the radish melts to a golden brown sweetness, the light sweetness of the beet explodes into an almost guilty seeming pleasure.  No worries though, guilt is not something you should worry about when eating these beauties.

Image

So this idea for roasted root vegetable chips all began with my refrigerator drawer full of slightly dangerous looking vegetables which I had received from my first CSA (community supported agriculture) delivery earlier this month.  I was so excited to for the CSA delivery having all these ideas in my head of what it would be like but then once I collected all my strange looking vegetables and got home I realized what am I going to do with these?  After ignoring them for too long I decided it was time to bring out the beasts.

Image

And little did I know, the little beasts hiding in my refrigerator were beautiful, sweet chips waiting to be roasted to crispy deliciousness.  It was a discovery up there with Christopher Columbus’s discovery of America.  And the best part is how simple it really is.  All the ingredients you have in your cupboard all you need is to hit up the closest farmer’s market or co-op and pick out all the ugly looking hairy, strange root vegetables you can find, slice em up thin and crisp them into delicacy.

Image

Ok quickly I am going to talk about CSAs and what they are all about for any of you who don’t know (I had never heard about them before just a few months ago!).  So a CSA, which again stands for community supported agriculture, is a way for farmers to directly connect to consumers.  The consumers pay a one time price, which supports the farm from which the consumer will receive fresh produce from the farm in return for the consumers support.  This could be a weekly, or a monthly delivery depending on the agreement between the farmer and the consumer.  CSAs are an amazing way to eat locally, seasonally and affordably.  I still have a drawer full of vegetables from a delivery in mid January, and since they are all winter vegetables they are holding up beautifully.  If you are interested in supporting sustainable living, local farms and experimenting with new, crazy foods I really suggest looking up where there is a CSA around you! Click on this link to look up CSAs across America, I wonder if they have these in other countries??

But back to the recipe!  Yummy roasted root veggie crisps just for you!

Roasted Root Vegetable Chips Recipe

Image

Ingredients

  • 2 fingerling potatoes, washed
  • 1 beet, washed and peeled
  • 1 radish, washed
  • 1 carrot, washed and peeled
  • 1 turnip, washed and peeled
  • 2 Tbs extra virgin olive oil
  • Salt and pepper, to taste

Directions

  1. Preheat oven to 275 degrees F
  2. Slice all vegetables into very thin (1/8 inch) slices*
  3. Place beets and potatoes on one baking tray (lined with parchment paper if you have it) and all the rest of the veggies (carrots, turnip and radish) on another
  4. Drizzle with olive oil and sprinkle salt and pepper, toss to cover all the vegetables
  5. Place both sheet pans in the oven, the tray with the carrots, turnips and radish should take about 45 minutes and the tray with the potatoes and beets no more than an hour.  Check regularly to ensure they are not burning

Notes

  • *Ok so you can use a mandolin for this step, yet, due to my recent mandolin injury I still can’t look at the tool without getting queasy. Knifes for me.  There were no mandolins used in the making of these chips.
  • When you take the chips out of the oven you may want to lay them on a paper towel to let the excess oil slide off of them. (I know we only used 2 Tbs of oil and there is excess, these are so much better than any fried chip!)
  • These are great by themselves or could be paired with some hummus (see my three homemade hummus recipes here!), or as a dramatic topping on a squash soup or an open faced sandwich (shout out to all you aspiring great chefs).

Well keep exploring and don’t let any of those beasts of root veggies scare you!

Leave a comment

Filed under Uncategorized

Baking With Butternut

Well, I am officially on my fourth week back home in good ol’ Brattleboro, Vermont. Now, don’t get me wrong, I love this place. Vermont is truly a state like no other. This is, after all, where I cultivated my love and interest for food and all things related – in a tiny, eclectic town with a Coop that rivals the size of our Price Chopper (but, seriously check out their website, sometimes they post cool stuff, like this article ).

Image

However, fancy Coops aside, things have started to get a little dull. Vermont is beautiful during the winter, but if you aren’t willing to strap yourself into skis or don’t fancy ten degree weather it can be a little boring. And my favorite part of Vermont during the warmer months, my wonderful, luscious garden, is buried under three feet of not-so-fresh snow. Oh how life would be different if I could run into the garden, load up on wild blueberries and fresh thyme to roll into a flaky pie crust.

Whether you get your produce from the ground, a green market, or supermarket its much easier to feel culinary inspiration when the fruits and veggies are looking a little livelier. However, there are plenty of fun and creative ways to utilize winter produce – even in baking, as I’ve recently learned in some boredom induced, kitchen experimentation. Butternut squash may not be as popular as raspberries, but it makes a mean muffin and you can feel good that instead of paying four bucks for a pint of wilted berries shipped in from god-knows-where, you’re making a responsible, seasonally appropriate decision.

Anyway, I encourage you all to try out this recipe, which I’ve adapted from Heidi Swanson’s website (check it out if you haven’t – it rocks) and her Brown Butter Spice Cake Recipe. Basically, I made it a muffin because that’s more fun and tinkered with a few ingredients. Here you go!

Image

Butternut Squash Muffins Recipe

Ingredients

1/2 C melted coconut oil

1.5 C whole wheat pastry flour

1 tsp baking soda

3/4 tsp cinnamon

1/2 tsp ground ginger

1/2 tsp cardamon

1/4 tsp pumpkin pie spice

1/4 tsp sea salt

1/8 tsp paprika

few grinds of black pepper

3/4 C cane sugar, plus more for topping

1/4 C brown sugar

2 large eggs

1/2 C butternut squash pureed together with raisins

1/4 C almond milk

½ C thin sliced almonds

chopped chili infused chocolate to taste

 ½ tsp molasses whisked with water and ½ tsp honey

 Start by preheating your oven 350 and oiling and flouring a muffin tin. Now, prepare the almonds. Measure out about ½ C of thin sliced almonds and toast them in your oven. Toast them well, within an inch of their life. Toast them so they are just burnt, but not to a charred mess. Combine flour, baking soda, spices, and salt in a large bowl. In a small bowl whisk together the sugar, eggs, puree, milk, and coconut oil. Add the wet ingredients to the dry and fold in almonds and chocolate chunks to taste.

Whisk together molasses, honey, and water and use the back of the spoon to spread on top of muffins when batter is poured into pan. Top with cane sugar and more burnt almond slices. Bake for 25-30 mins, until a knife stuck in the middle comes out clean, but do not over cook – you want to retain the moistness the puree lends to this recipe.

Have more butternut squash than can fit into a muffin? Do not fear! The reason I made these in the first place was to use up some leftovers from this delicious recipe. Got even more leftover? I had even more leftover too (wow, squashes are big). I sautéed mine in a pan with some butter, raisins, salt, pepper, and shredded coconut than mixed it together with some carrots I roasted in olive oil with oregano, mint, and cilantro. Enjoy!

Image

1 Comment

Filed under Uncategorized

Asparagus, Amen

My lanky figure inarguably links me to asparagus, the bringer of spring, the frill-crowned queen of the garden, the greenery that, as Marcel Proust noted, “transforms my chamber-pot into a flask of perfume.”  When I started working at the farmer’s market in Union Square last May, my greetings and orientations were less than heartfelt: the excitement of my fellows was stolen (or, less bitterly, rightfully and traditionally stimulated) by the coming of spring and the start of The Season, signaled by great fields of green stalks and a predictable increase in the sale of Hollandaise sauce.

My grandfather started an asparagus bed before I was born on land that my parents now live on and tend to.  The plant thrives in the well-drained, sandy soil of Cape Cod and requires patience: the first two seasons don’t produce any harvestable stalks.  But on the cool mornings of future springs, the asparagus will begin its assent (a remarkable 10″ a day, under extraordinary condiditons) and call compellingly to be laid next to a poached egg on an early morning.  The stalks rise with the sun as I stretch myself for the sweet, warm weather.  It is an extraordinary vegetable, a harbinger of summer’s joy.

Now, as the frost of January descends on the Northeast, I find myself at home in New England.  The chickens have cut their production of eggs in the face of shorter days.  The bees died, mites having invaded their hive.  Snow has begun to cover the garden and, in the corner of the yard overlooked by the proudly sinking shell of a ghostly old house, I tuck the twenty-year-old asparagus bed into the comforting protection of newspaper and compost.  This, after weeding and tilling, replanting and tidying.  A wiping of the slate in preparation for the next coming of warmth.  I, freshly bathed, wrap myself in a blanket and, by a fire, sip on sweetened tea and enjoy warmth, rest, and a refreshing meditation on the great cycle of activity and rest that exist in the body of the farmer and the body of the vegetable alike.

Leave a comment

Filed under Uncategorized

Winter Windowsill Gardens

It’s that time of year again. The air is becoming cold with the anticipation of snow and the windows warm with the glow of fluorescent bulbs. It’s winter and even before Thanksgiving plates were cleared this past week, New York went into full Christmas swing. But as window displays, panicked shoppers, and yummy peppermint themed products become prominent, there is something missing – the little bit of nature that we city dwellers hold on to so dearly. The occasional fall foliage fades, leaving spindly trees bare in the park and scattered flowers say goodbye till next year. The big tree at Rockefeller is just not going to cut it.

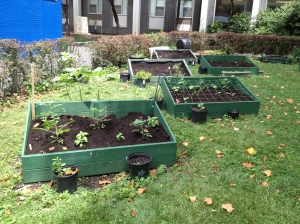
How to solve this problem? What about a windowsill garden? CommAg has discussed starting a network of window gardens, and my roommates and I are giving it a try.  It’s proved…moderately successful (kind of). Our downfall can be blamed partially on our lack of knowledge, but definitely on our lack of plant watering skills as well.

Anyway, in an effort to re-motivate myself (and now you as well!) I have compiled some tips about makeshift window gardens.

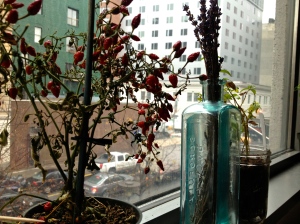
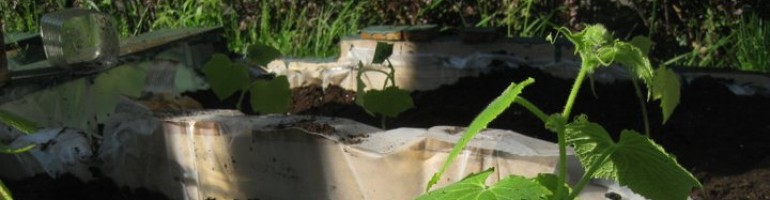
(check out our pretty pepper plant dried flowers)

First off, what should one grow on a windowsill garden?

My roommates and I have tried a myriad of different herbs, which have been pretty successful, as well as a decorative mini-pepper plant, some surprisingly robust Moroccan mint that has been going since the beginning of the semester, and an attempted avocado that never was. Of course you will want to add some flowers too, in pretty vases or maybe wine bottles. It is a garden after all, it should be pretty, right? Plus, when those flowers inevitably die they will become wonderful dried wall decor.

Additionally, it’s recommended that you grow herbs that won’t crowd each other, ones that won’t grow too tall or too wide – chives, lavender and thyme being good examples. Mint won’t get too out of hand either, but is anti-social and can’t be put in the same pot as other herbs.

What are some other things you should know before starting your brand new, lush windowsill garden?

1. Sun. Well, perhaps most obviously, you need a sunny windowsill – preferably South/Southeast facing, anywhere that gets at minimum 5-6 hours of sun a day. You could also look into purchasing grow bulbs – available on Amazon.

2. Buy your plants. I recommend purchasing plants rather than seeds. It’ll be a little pricier, but buy at the Union Square Greenmarket and you’ll get great quality and the satisfaction of supporting good people. Seeds will take a lot more time and are more likely to be forgotten and neglected in the corner of your room. Also, not all herbs grow from seed very well, and actually its often recommended that instead you start with cuttings (literally a little piece of herb cut from an already established plant). If you’re feeling adventurous, you could experiment with cuttings – its not complicated. Here’s a link to starting rosemary from a cutting to get you started.

3. Get the right container. Make sure your container is big enough! About 6 – 12 inches deep. And more herbs in one pot = a bigger pot. Seeds can be started in a small pot and eventually transferred to a larger one. If more potting soil is needed, you can get a really great mix from the compost collection table at the Union Square Greenmarket for $6-$12.

4. Water. This was our downfall. Just remember to water them. Google it, figure out how much water your specific herbs need and then water them this amount no matter what, or else I promise (from personal experience) they will die. But also make sure that they get good drainage. Too much water can be just as detrimental as too little. Just watch your plants closely – they will tell you when they are thirsty.

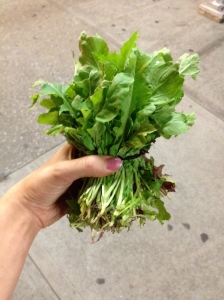
5. And finally, EAT THEM. These herbs don’t just exist to be checked off your bucket list – they are fully functional (and delicious). Experiment with different mints to be used in your tea. Add them to salads, pastas, and homemade dressings! Basil is good on everything in my opinion. Feeling adventurous? Get creative then, these fresh herbs won’t last forever so use this as an excuse to go on a daring chefs binge. Lavender can be an especially yummy culinary tool – a new flavor added in to shortbread, cupcakes, and glazes – or used to spice up your seasonally appropriate hot chocolate (because everyone should be drinking hot chocolate at least from now until December 25).

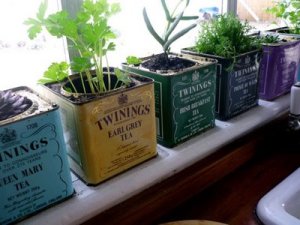
And on that note – get creative with the garden too. If you frequent Pinterest as much as I do you have probably seen these adorable pictures of plants growing in tea tins. Genius!

(you would water your plants if they looked like this)

Of course, winter break is coming up so one last helpful tip – wait till after break to start your garden. Your plants need attention and care and can’t be left to fend for themselves in an empty dorm for five weeks. Use this time to plan and inspire yourself, so that you are ready to start your own personal paradise when you return! I know I will (perhaps even re-doing the failed avocado tree? There might be more to come on that…)

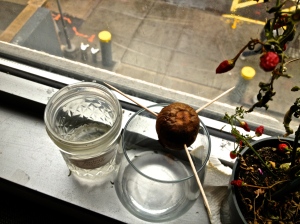
(our failed avocado plant…maybe more on that to come…)

Leave a comment

Filed under Uncategorized